Introducing Unfamiliar Land

April 25, 2019

I’m going to be writing more about technology here this year (I know, I’ve been neglecting this blog) but in the meantime, I’d like to introduce Unfamiliar Land, a new travel blog I’ve been working on.

Unfamiliar Land is where I’m showcasing stories and photography from strange and unusual trips I’ve been on. Like an abandoned nuclear research lab in the forests near Atlanta. An old animal zoo in the hills of LA’s Griffith Park. An atomic tourism themed roadtrip through the southwest. And there’s much more coming.

See you out there.

An easy way to get more ratings and reviews for your app!

April 02, 2017

Many of the best indie iOS apps have a prompt in settings asking you to leave a rating on the App Store. Maybe it also includes the number of people who’ve rated the current version, as extra motivation for the first few people to download an update. Good ratings are critical to your marketing plan, and this stuff does work. It’s also extremely unobtrusive compared to some of the other methods of asking for ratings. There’s really not much downside!

Settings

Let’s start with fetching the number of ratings. It sounds tricky, but there’s a simple JSON API for getting this information: http://itunes.apple.com/lookup?id=1115825373 (replace the last parameter with your own app ID). Here’s an example Swift class to fetch the ratings count.

class AppStoreInfoDownloader {
    
    private(set) var ratingCount: Int?
    
    init() {
        fetchAppStoreInfo()
    }
    
    func fetchAppStoreInfo() {
        let appId = Configuration.App.AppStoreAppId
        let url = URL(string: "http://itunes.apple.com/lookup?id=\(appId)")!
        let configuration = URLSessionConfiguration.default
        let session = URLSession(configuration: configuration)
        
        let task = session.dataTask(with: url) { [weak self] (data, response, error) in
            guard let data = data, error == nil else { return }
            do {
                let json = try JSONSerialization.jsonObject(with: data, options: []) as? [String: Any?]
                let results = json?["results"] as? [[String: Any?]]
                let result = results?.first
                self?.ratingCount = result?["userRatingCountForCurrentVersion"] as? Int
            } catch {
                print("Error parsing JSON for iTunes ratings count: \(error)")
            }
        }
        
        task.resume()
    }
}

I’ve simplified this a bit to avoid unnecessary detail. In a real-world app I’d use an NSOperationQueue to manage all of my network operations. Also, keep in mind that the App Store doesn’t report the number of ratings until at least five people have left a review. If you just launched a new app, the userRatingCountForCurrentVersion key may not exist.

In my app I initialize an instance of AppStoreInfoDownloader at launch, so the ratings count is available immediately when the user opens the settings view. Assuming you have a label in your UI to show the ratings count, here’s how you might configure it in viewDidLoad().

fileprivate func updateReviewCount() {
    let version = "version \(Configuration.App.Version)"
    switch appStoreInfo?.ratingCount {
    case .some(let count) where count == 0:
        ratingsCountLabel?.text = "No one has rated \(version) yet. 😞"
    case .some(let count) where count < 10:
        ratingsCountLabel?.text = "Only \(count) \(count == 1 ? "person has" : "people have") rated \(version). 😔"
    case .some(let count):
        ratingsCountLabel?.text = "\(count) people have rated \(version). 🙂"
    default:
        ratingsCountLabel?.isHidden = true
    }
}

If ratingCount is nil I just hide the label. It’s important to check for this case. The user may not have network connectivity, Apple might change the JSON response in the future, or any number of other things could potentially go wrong.

The last part is to handle the user tapping your prompt.

    @IBAction func rateApp(_ sender: AnyObject?) {
        let url = URL(string: "itms-apps://itunes.apple.com/app/id1115825373?action=write-review")!
        UIApplication.shared.open(url, options: [:], completionHandler: nil)
    }

Pay attention to the last parameter, action=write-review! That’s something new that was announced along with the changes to iOS 10.3. It does work with previous versions of iOS (at least the ones I’ve tested), and takes the user directly to the App Store review page without any friction.

If you want to see this in action, you can download my app for guitarists here. And I certainly wouldn’t mind if you left a nice review. 😉

Break out of an outer loop in Swift

March 02, 2017

It’s not uncommon to write a nested for loop, where you need to break out of the outer loop when a condition is met in the inner loop. In some languages you might use a variable for this, but in Swift there’s a cleaner way: labeled statements!

func indexPathFor(_ contact: InviteContact) -> IndexPath? {
    var indexPath: IndexPath? = nil
    
    outer: for sectionIndex in 0...dataSource.sectionCount {
        for (rowIndex, next) in dataSource.contactsFor(sectionIndex).enumerated() {
            if contact == next {
                indexPath = IndexPath(row: rowIndex, section: sectionIndex)
                break outer
            }
        }
    }
    
    return indexPath
}

It’s small things like this that help make Swift code clean, readable and fun to write.

How to send To-Do’s from Amazon Echo to Cultured Code’s Things

December 14, 2016

I’ve been using Things as my task management app for years and have no intention of giving it up anytime soon. Unfortunately there’s not much integration with devices or platforms outside the Apple ecosystem. I thought I’d be out of luck when it comes to the Amazon Echo, but there’s actually an easy solution: IFTTT!

There’s not much to this, but here are the basic steps:

  1. Create an IFTTT account and install the app, if you don’t have it already. You’ll need the app installed to sync with iCloud.
  2. In IFTTT, add the Amazon Alexa service and create a new applet. Use Item added to your To Do List as the trigger, and Add reminder to list as the action. You’ll probably want to specify a list name, too.
  3. In Things, open preferences and enable “Show reminders from…” for your iCloud reminders list. You’re done! Tell your Echo to add something to the to-do list, and it should appear as available to import in Things.

You may need to open the IFTTT app the first time you add a to-do, in order for it to prompt you for access to reminders. Afterwards everything will run in the background, although it can take a while for new items to appear.

This workflow isn’t quite perfect, but it’s enough to get by until Things adds its own support for the Echo.

Switching to Jekyll

November 24, 2016

Are we still calling these things blogs? It certainly feels like blogging is an outdated technology these days. The type of thing that Google, Facebook and Medium are trying to kill off entirely. But there are still people in the tech community who are succeeding at doing things the “old internet” way, and I admire that. Building their own website, controlling their own content, and making something to be proud of.

For what it’s worth, I want to keep my blog around for a while. So I’ve decided to switch to Jekyll. I’ve been using Ghost for a year or two now, but I kept running into the same frustrations I had with Wordpress. I’m constantly behind on updates. Changing the layout is difficult because I have to re-learn how theming works, even for a small tweak. I think Jekyll is going to be a better fit for me. It’s not perfect, but it already feels like there’s less tooling standing in the way of writing and maintaining this site.

Anyway, I guess what I’m trying to say is, I apologize if you see a bunch of duplicate RSS items today!

Send data from your Arduino to HomeKit!

November 23, 2016

In my last post I described how to configure Homebridge to control Belkin WeMo switches through HomeKit. This is great, but it’s only part of my home automation story. My previous custom app included temperature and humidity sensors from Arduino Yún devices throughout my apartment. Fortunately it’s (almost) as easy to add these sensors to HomeKit as it is to add WeMo switches.

Arduino Yún

The Arduino Yún was discontinued earlier this year, so I can’t exactly recommend it if you don’t already have your own hardware. But any microcontroller that can serve up JSON will be fine. If you’re using an Arduino, I put one of my sketches here as an example. If you’re a beginner to this stuff and haven’t bought anything yet, remember that you can’t beat Adafruit for selection of parts and great tutorials.

The more powerful devices let you assign a hostname like livingroom.local, but if you’re accessing it through an IP address you should assign a static IP on your router so its address doesn’t change in future. You want your device to output a small chunk of JSON like this:

{
    "temperature": 21.61,
    "humidity": 48.85
}

Invalid output will just crash Homebridge, so use your browser to make sure it’s sending a valid result. When you’re satisfied, install the plugin on the computer running Homebridge:

sudo npm install -g homebridge-httptemperaturehumidity

Now open up ~/.homebridge/config.json and add each of your devices under the accessories section.

"accessories": [
    {
        "accessory": "HttpTemphum",
        "name": "Arduino Yún (Living Room)",
        "url": "http://livingroom.local/arduino/temp",
        "http_method": "GET",
        "humidity": true
    },
    {
        "accessory": "HttpTemphum",
        "name": "Arduino Yún (Bedroom)",
        "url": "http://bedroom.local/arduino/temp",
        "http_method": "GET",
        "humidity": true
    }
]

Restart Homebridge and you should see your sensors in HomeKit!

Unfortunately, there are a few caveats. The iOS Home app is limited in what it can do. There’s no history, and you can’t create an automation or get an alert based on a temperature reading. And the Homebridge plugin is less than perfect. It can take a few seconds to update values, and occasionally it will time out altogether. But I’m hoping both HomeKit and Homebridge continue to get better over time. And it is neat to ask Siri, “what’s the temperature in bedroom?” and get a response.

How to add HomeKit support to your Belkin WeMo switches today

September 18, 2016

iOS 10 was released last week, and comes with a new Home app to control devices that use Apple’s HomeKit protocol. It’s pretty nice, especially combined with Siri and the Apple Watch. But are Belkin WeMo owners out of luck? Earlier this year Belkin announced they had no plans to add HomeKit support (not surprising, since it would require different hardware). Fortunately there’s a solution… Homebridge! It’s completely free, takes 10 minutes to set up, and gives you full HomeKit compatibility for your WeMo devices.
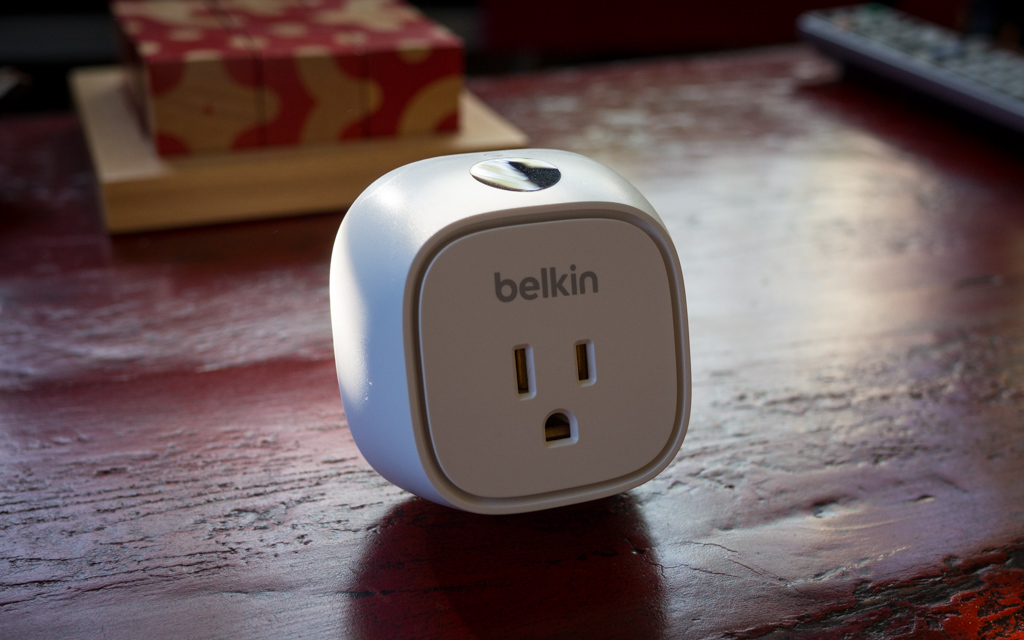
Belkin Wemo Switch

Homebridge is a Node.js server that acts as a bridge between HomeKit and other home automation devices. It’s a pretty great piece of software, and so far (fingers crossed) it’s worked extremely well on my network. I only have WeMo switches at my house, but Homebridge supports hundreds of different devices through its plugin architecture.

The only prerequisite for Homebridge is Node.js and NPM. There’s a guide on Treehouse to install it on your Mac if you don’t already have it. When you’re done, installing Homebridge is simple:

  • Run sudo npm install -g homebridge to install the Homebridge server.
  • Run npm install -g homebridge-platform-wemo to install the Homebridge WeMo plugin.

You’ll also need to create a new file called config.json in your ~/.homebridge folder. Here’s what mine looks like:

{
    "bridge": {
        "name": "Homebridge",
        "username": "CC:22:3D:E3:CE:30",
        "port": 51826,
        "pin": "728-15-728"
    },
    "platforms": [
        {
            "platform": "BelkinWeMo",
            "name": "WeMo Platform",
            "expected_accessories": "4",
            "timeout": "25",
            "no_motion_timer": "60",
            "homekit_safe": "1"
        }
    ]
}

You must change expected_accessories to match the number of WeMo devices on your network, but otherwise there’s not much to configure. Take a look at the WeMo Platform Plugin page for details.

Save your config file and run homebridge from the command line. You’ll see a code to pair with HomeKit. Open the Home app on your phone, tap Add Accessory, and you should see your Homebridge server! Homebridge is sensitive to mistakes in config.json, so if you see any strange errors check it for problems or invalid JSON. Otherwise, once things are working correctly, you can use forever to keep Homebridge always running in the background.

There’s one more step you might want to do if you have an AppleTV 4. You can use your AppleTV as an iCloud HomeKit hub, allowing you to control devices when you’re away from your home wifi network. For this to work you need to turn on two factor authorization for your iCloud account. Think you’ve already done this? It’s likely you have two-step verification enabled, not two-factor authentication. Okay, this is confusing, and Apple doesn’t explain it well at all. But it’s easy to fix. Follow this guide at Six Colors and you’ll be set.

Tab Workroom is in the App Store!

July 06, 2016

I’m excited to announce the first major milestone of my new indie software company, Once Living. Tab Workroom 1.0 for iOS is available on the App Store!

I made Tab Workroom to help practice guitar and build a library of tabs and chords for the songs I love to play. It’s the iOS equivalent of a three ring binder for your songs. Add tabs (there’s a built-in web browser to make finding content easy) and practice them anywhere. Tab Workroom includes a custom CloudKit sync engine to make sure your content is always available on all your devices. And of course, features like fullscreen and autoscroll for practicing your songs.

It’s nice to see Tab Workroom in the App Store, but there’s still a ton left to do! I’m currently working on a macOS companion app, adding iPad support, and continuing to add additional features to help people play and learn new songs. If Tab Workroom is an app for you, don’t hesitate to send feedback about what features you’d like to see.

Download Tab Workroom here for free. Follow @OnceLivingApps or sign up to the mailing list for news on future updates!

Is this the end of iCloud Core Data?

June 17, 2016

Michael Tsai wrote a summary on the apparent deprecation of iCloud Core Data:

Fast forward to WWDC 2016. When installing the Xcode 8 beta, I noticed that all of the symbols related to iCloud Core Data were marked as deprecated in macOS 10.12 and iOS 10, with the comment “Please see the release notes and Core Data documentation.” Strangely, the Core Data release notes and What’s New in macOS 10.12 documents make no mention of this. What’s New in iOS 10 simply says that “Several NSPersistentStoreCoordinator symbols related to ubiquitous content” have been deprecated.

Writing your own CloudKit based syncing solution is hard, but worth it in my opinion.

Four Random and Unrelated Core Data Tips

June 06, 2016

  1. Marcus Zarra is still the undisputed Core Data expert in my book. People who are new to Core Data tend get hung up around its threading model, but if you follow his advice you won’t have any problems. Even if you’re experienced with Core Data, you should watch his talk on the subject at least once. This related talk on networking is worth your time too.

  2. A new feature of iOS 8 is NSBatchUpdateRequest, which solves some of the problems with updating a set of objects that’s too large or slow to fetch into memory. But watch out! I didn’t even think about it at first, but NSBatchUpdateRequest completely bypasses the threading model mentioned above. There are still ways to safely use it, but my recommendation is to simply avoid it unless it’s something you legitimately need.

  3. Another new feature in iOS 9 is Core Data Constraints. Instead of following the fetch and create pattern when inserting data, you can set a constraint on an attribute and Core Data will check for existing objects with the same identifier. Handling conflicts seems messy though. I think I’m going to avoid this feature for now. Maybe I’ll change my mind, though.

  4. When you declare an @NSManaged var in your managed object subclass, normally it can be an Int, Bool, or Double. But not for Core Data primitive accessors! Primitive accessors (not to be confused with primitive types, I’m talking about methods that are a shorthand for primitiveValueForKey: … ) must be declared as an NSNumber. You don’t have to explicitly wrap your value in an NSNumber, you can still assign an Int or Double to your var and Swift will box it up for you. Not a big deal, but something to remember if you find your app crashing.

Announcing Once Living

May 30, 2016

Here’s a small secret I’ve just recently started to tell people about. I’ve been working on a new project this year. It’s a new indie software company I’m starting, called Once Living.

The first product I’m releasing is Tab Workroom, an iOS and OS X app for guitar players to collect tabs and chords. Although Once Living is new, Tab Workroom isn’t. It’s been an occasional side project for almost four years now. I play guitar, not in a serious way, but enough that I have pretty nice collection of tabs that I love playing. I built Tab Workroom to be the best possible way to organize and practice my collection of songs.

Building an app (even a small one) is never easy, but it’s been a lot of fun watching Tab Workroom come together. The folks over at The Iconfactory did a fantastic job on the app icon, and I love seeing it on my homescreen. The future is bright too. I have a lot planned even after the initial iOS release!

Tab Workroom is in private beta and will be available in the App Store soon. If you’re interested in learning more about the launch, sign up for the mailing list and follow @OnceLivingApps on Twitter. I’m excited to show you what I’ve been working on!

Better Segue Identifiers

March 14, 2016

Lately I’ve been thinking about segue identifiers. We all know it’s bad practice to use strings instead of constants for identifiers. All it takes is one spelling mistake or forgetting to update a name, and you have big trouble that’s not visible until runtime. But there’s no getting around this in Xcode, unless you stop using segues altogether (and no, you don’t want to do that).

In my current project (the first where I’ve gone all-in on storyboards and segues) I’ve reached the stage where many view controllers have a non-trivial number of segues. And so I started wondering if maybe there is some sort of safer, Swift-y way of managing identifiers in code. Of course it turns out that @NatashaTheRobot has already thought about this! You can read her post about it right here.

I tweaked her solution a little bit for my own needs. The biggest change is adding segueIdentifierForName(), to check the segue identifier string given in shouldPerformSegueWithIdentifier(). Natasha’s blog has the background, but to start you create a SegueHandlerType protocol:

import UIKit

protocol SegueHandler {
    typealias SegueIdentifier: RawRepresentable
}

extension SegueHandler where Self: UIViewController, SegueIdentifier.RawValue == String {
    
    func performSegueWithIdentifier(segueIdentifier: SegueIdentifier, sender: AnyObject?) {
        performSegueWithIdentifier(segueIdentifier.rawValue, sender: sender)
    }
    
    func segueIdentifierForName(name: String) -> SegueIdentifier {
        guard let identifier = SegueIdentifier(rawValue: name) else { fatalError("Invalid segue `\(name)`.") }
        return identifier
    }
    
    func segueIdentifierForSegue(segue: UIStoryboardSegue) -> SegueIdentifier {
        guard let name = segue.identifier else { fatalError("Segue has empty identifier!") }
        return segueIdentifierForName(name)
    }
}

When you create a segue, make the source view controller implement SegueHandlerType by providing a SegueIdentifier enum with the identifiers you set in Interface Builder. You don’t have to include the segues you’re not dealing with in code, but you should— it’s useful when making changes to see all the segues declared in code.

class LibraryViewController: UITableViewController, SegueHandler {
        
    enum SegueIdentifier: String {
        case OpenFile
        case ChooseFolder
        case OpenSettings
    }
        
    override func prepareForSegue(segue: UIStoryboardSegue, sender: AnyObject?) {
        switch segueIdentifierForSegue(segue) {
        case .OpenFile:
            // prep the destination view controller
        case .ChooseFolder:
            // prep the destination view controller
        case .OpenSettings:
            // prep the destination view controller
        }
    }
        
    override func tableView(tableView: UITableView, didSelectRowAtIndexPath indexPath: NSIndexPath) {
        performSegueWithIdentifier(.OpenTab, sender: nil)
    }    
}

I’ll reiterate: this is ALL @NatashaTheRobot’s solution, just changed a little for my own needs. I can’t take credit for her awesome work!

It’s not 100% foolproof, but I like this way of dealing with segue identifiers. I’m using it in a couple of my projects, and as long as you’re careful to keep your code current with Interface Builder it’s a much cleaner and safer way to work.